To get started, make sure your robot vacuum is Siri-compatible—models like the Narwal Freo Z10 and Narwal Freo Z Ultra are great choices. You'll also need a HomeKit hub—like a HomePod, Apple TV, or iPad—to link Siri with your vacuum. Once everything is set up, you can manage your vacuum directly through the Home app on your iPhone or iPad.
In this guide, we’ll walk you through the setup, help you configure Siri commands, and share tips for troubleshooting common issues. Plus, we’ve got some maintenance advice to keep your vacuum working like new.
Ready to make cleaning easier? Let’s get started!
Control Robot Vacuum with Siri: Prerequisites
Before you can control your robot vacuum with Siri, it's essential to ensure that both your vacuum and the devices you're using are compatible. Here’s what you need to get started:
Best Robot Vacuums for Siri Integration
Not all robot vacuums are compatible with Siri. However, our models work well with Apple's voice assistant. If you're looking to control your robot vacuum with Siri, the Narwal Freo Z10 and Narwal Freo Z Ultra are excellent choices.
Narwal Freo Z10 Robot Vacuum & Mop
The Narwal Freo Z10 is an intelligent robot vacuum and mop combo that stands out with its bionic hand scrubbing system, designed to simulate human hand movements. It efficiently handles corners and tough stains. With the DirtSense 3.0 system, it detects dirt levels in real time and adjusts suction power accordingly, ensuring a thorough clean every time. You can easily control it through Siri by simply saying “Hey Siri, start cleaning” or “Hey Siri, pause cleaning.” The Z10 is perfect for those who want a smart, hands-free cleaning experience with minimal effort.
[cta:narwal-freo-z10-robot-vacuum-mop]
Narwal Freo Z Ultra Robot Vacuum & Mop
For an even more advanced cleaning experience, the Narwal Freo Z Ultra is an excellent choice. It features dual HD cameras and AI chips, allowing it to avoid obstacles and make real-time cleaning decisions. Whether it’s dust or liquid, the Z Ultra automatically adjusts its suction or mopping function for the most effective clean. Its self-cleaning base station automatically empties dust and washes the mop, minimizing maintenance. With Siri integration, you can easily command it to clean specific areas or return to its docking station with simple voice commands like “Hey Siri, clean the kitchen” or “Hey Siri, go back to the dock.”
Both of these models offer top-tier cleaning performance and Siri compatibility, making them ideal for anyone looking for a smarter and more efficient home cleaning experience.
[cta:narwal-freo-z-ultra-robot-vacuum-mop]
HomeKit-Compatible Devices
To control your robot vacuum with Siri, you might need a HomeKit hub. This could be:
HomePod or HomePod Mini
The HomePod and HomePod Mini are smart speakers made by Apple. They act as HomeKit hubs, meaning they enable Siri to control your HomeKit-compatible devices, even when you're not home. Once set up, you can use your HomePod or HomePod Mini to give voice commands to Siri, such as asking it to start cleaning with your robot vacuum.
-
HomePod: Offers superior sound quality and acts as a central hub for your smart home devices.
-
HomePod Mini: A smaller, more affordable version of the HomePod with excellent voice control features.
Apple TV (4th generation or later)
An Apple TV (4th generation or newer) can also serve as a HomeKit hub. It’s primarily a streaming device, but when connected to your home network, it allows you to control your HomeKit accessories remotely. So, if you’re watching TV and want to start your robot vacuum, you can simply ask Siri to do it.
iPad (iOS 10 or later, configured as a HomeKit hub)
If you have an iPad running iOS 10 or later, you can use it as a HomeKit hub by setting it up in the Home app. This allows you to control all your compatible smart home devices, including your robot vacuum, using Siri. Even if you’re not at home, as long as the iPad is connected to your Wi-Fi, you can send commands remotely.
iOS Device
An iOS device refers to any device that runs Apple’s iOS operating system, such as an iPhone or iPad. These devices are essential for setting up and controlling your robot vacuum through Siri and the Home app.
iPhone or iPad (Running a Recent Version of iOS)
To set up and control your robot vacuum with Siri, you need an iPhone or iPad that’s running a recent version of iOS. This is important because newer versions of iOS come with the latest features and security updates needed to connect and control your smart home devices, like your robot vacuum.
The Home App
The Home app is a built-in app on your iPhone or iPad that allows you to manage your HomeKit-enabled devices, including robot vacuums. Once your vacuum is connected, you can control it using the Home app or Siri. The app provides a central place to monitor and adjust the settings of all your smart home gadgets.
Setting Up Your Robot Vacuum for Siri Control

For this part, it’s best if you pay attention more. Try and follow these steps to ensure you’re able to control your robot vacuum with Siri.
Step 1: Unbox and Charge.
Start by unboxing your robot vacuum and plugging it into the charger. Let it charge fully before proceeding with the setup.
Step 2: Wi-Fi Connection.
Follow the manufacturer's instructions to connect your vacuum to your home Wi-Fi network. This usually involves using the vacuum’s dedicated app.
Step 3: Download the App.
Go to the App Store on your iOS device and download the app specific to your robot vacuum (e.g., Narwal's app for Narwal Freo X Ultra). This app will guide you through the setup process and allow you to manage your vacuum settings.
Connecting the Robot Vacuum to HomeKit
Once you’re through with the above procedures, proceed to enable HomeKit integration. To do so, follow these steps:
Step 1: Open the Robot Vacuum App. Navigate to the settings section within the app.
Step 2: Find HomeKit or Siri Integration. Look for options related to HomeKit or Siri integration. This might be labeled differently depending on the brand.
Add Device to HomeKit
Step 1: Open the Home App. On your iOS device, open the Home app.
Step 2: Tap the "+" Icon. Select "Add Accessory."
Step 3: Scan the HomeKit Code. Use your iPhone or iPad to scan the HomeKit setup code found on your vacuum or within the app. Follow the on-screen instructions to complete the setup.
Configuring Siri Commands

By default, Siri will control the robot (start, pause, etc.) based on the exact name of the shortcut you've created. Therefore, you must always use the precise name of the shortcut when instructing Siri.
However, you can customize the phrase you use to control the robot vacuum. For example, instead of saying, "Start my robot vacuum," you can rename the shortcut to "clean the house," which is what most people use. Similarly, instead of saying, "Pause my robot vacuum," you can rename that shortcut to "Pause the cleaning." You can apply this customization to each shortcut. For those who want to name your robot but haven’t got an idea, we have a blog post recommending our 47 thoughtfully picked funny and good names for a robot vacuum.
An alternative approach is to duplicate your shortcuts. Essentially, you can create multiple identical shortcuts with different names. Although they perform the same function, they can be activated by Siri using various key phrases.
For example, you can duplicate the "Hey Siri, start the vacuum" shortcut multiple times, naming one "Clean the house" and another "Send the robot to the kitchen." This provides flexibility in how you instruct Siri to command the robot. Ultimately, you will need to use the exact shortcut name for Siri to execute the command.
It's important to note that using Siri's voice commands to start your robot vacuum works flawlessly on your iPhone or iPad. However, it can be less reliable when initiated from your HomePod.
HomePod users familiar with home automation might not be surprised. However, the shortcut might be inconsistent when used with a HomePod. Sometimes, it works perfectly, and other times it reports a problem. This issue lies with HomeKit, not the shortcut itself, and is beyond your control.
Custom Shortcuts
For more tailored control, you can create custom Siri Shortcuts:
Step 1: Open the Shortcuts App. On your iOS device, open the Shortcuts app.
Step 2: Create a New Shortcut. Tap the "+" to create a new shortcut.
Step 3: Add Actions. Select actions related to your robot vacuum from the Home app or the robot vacuum's app.
Step 4: Automate Routines. For instance, set a shortcut to start the vacuum when you leave the house or create a specific command like, "Hey Siri, clean the living room."
Troubleshooting and Tips for Siri-Controlled Robot Vacuums
When using Siri to control your robot vacuum, there are a few common issues you might encounter. These include connectivity problems, unresponsive Siri commands, HomeKit syncing issues, and difficulties with custom commands not being recognized. Here’s how to resolve each of them.
Connectivity Issues
A frequent issue is connectivity. If your robot vacuum isn’t responding to Siri commands, it could be due to a weak or unstable Wi-Fi connection. This can disrupt communication between your robot vacuum and iOS device. To resolve this, make sure your Wi-Fi network is stable with a strong signal. If problems persist, try rebooting your router to reset the connection.
Unresponsive Siri Commands
There are times when Siri might fail to execute commands for your robot vacuum, even though it hears them clearly. This can happen if the vacuum isn't connected to your network properly or is powered off. Double-check that the vacuum is powered on and linked to the Wi-Fi network. Also, ensure that Siri is properly set up on your iOS device and can clearly hear your voice commands. If the issue persists, verify that the vacuum is correctly added to the Home app.
HomeKit Issues
If Siri recognizes your command but the robot vacuum doesn't respond, it might be a HomeKit-related issue. Open the Home app and check if the vacuum is added and active within the app. If not, removing and re-adding the vacuum to HomeKit can often resolve any syncing issues.
Custom Commands Not Recognized
If you're using custom commands for your robot vacuum, Siri may occasionally fail to recognize them. This usually happens if the commands are too long, complex, or too similar to other phrases. Ensure the commands you've set in the Shortcuts app are clear and distinct. If necessary, simplify or modify the commands to make them more recognizable for Siri.
Maintenance Tips
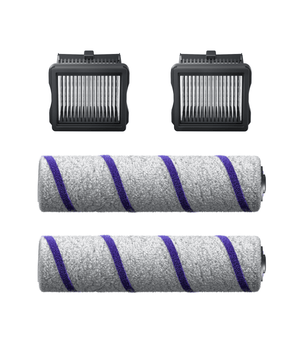
You have to do regular cleaning. Clean the vacuum's brushes and empty its dustbin regularly to maintain optimal performance. Additionally, you have to perform software updates. Keep both your iOS device and robot vacuum’s firmware up to date for the best functionality and security.
Further Reading: How to Maintain Your Robot Vacuum: Step-by-Step Guide
Final Thoughts

Connecting and controlling your robot vacuum with Siri involves a few straightforward steps: ensuring compatibility, setting up your vacuum, connecting it to HomeKit, and configuring Siri commands.
Remember, the convenience and efficiency gained through smart home automation are immense. With Siri and your robot vacuum working together, you can enjoy a cleaner home without the hassle, allowing you more time to focus on the things that matter most. Also, you might still face some challenges with following the steps discussed above, and for that reason, you can contact us to get more information or help.


