


Want your robot vacuum to clean smarter and last longer? Start by keeping its sensors in top shape. All it takes is a simple routine: power off, gently clean each sensor—from cliff and infrared to dirt and Lidar—and test the vacuum’s performance afterward. These small steps make a big difference in how well your vacuum navigates, avoids obstacles, and targets dirt.
This article walks you through each key part of sensor maintenance: where to find them, how to clean them safely, how often to do it, and how to fix common problems. Whether you have pets, stairs, or a busy floor plan, keeping your sensors clean helps your vacuum work like it should—consistently and accurately.
Step 1: Power Off and Prepare Your Workspace
Turn off your robot vacuum and unplug it from the charging base. Place it upside down on a clean, soft cloth to protect the surface from scratches.
Tip: Use a flashlight or work near a window to see hidden dust more clearly.
Step 2: Identify All Sensor Types and Locations
Sensors vary by model but typically include:
-
Cliff sensors (bottom edges) – prevent falls
-
Bumper sensors (front shell) – detect obstacles
-
Infrared sensors (sides/top) – assist in docking and navigation
-
Dirt sensors (near the brush or suction area) – detect heavy dirt zones
-
Lidar or cameras (top/front) – used in higher-end models for mapping
Refer to your user manual or brand website for exact sensor placement.
Step 3: Clean Cliff Sensors
These sensors prevent falls from stairs or edges. Use a dry microfiber cloth to wipe each sensor window gently. For stubborn dust, lightly dampen the cloth (if permitted) and follow with a dry wipe. Use a small brush to clear any trapped debris. Clean every 1–2 weeks.
Step 4: Clean Bumper and Obstacle Sensors
Gently press the bumper to ensure it moves freely. Wipe all outer surfaces and embedded sensor windows with a soft cloth. Use a cotton swab or compressed air to clean narrow corners. If the robot frequently bumps into objects, check this area first.
Step 5: Clean Infrared and Navigation Sensors
These include docking and wall sensors. Wipe outward-facing surfaces and docking sensor windows on both the robot and the base station. Keep 0.5 meters of space around the dock for accurate detection. Clean these sensors monthly or after frequent docking errors.
Step 6: Clean Dirt Sensors
If your robot has dirt detection, remove the brush housing and clean the sensors near the suction inlet with a microfiber cloth or soft brush. Avoid liquids unless the manufacturer recommends them. Clean more frequently if your home has pets or high foot traffic.
Step 7: Clean Lidar or Camera Modules
If equipped, gently wipe the lidar dome or camera lens using a dry, lint-free cloth. Do not apply pressure or use alcohol-based cleaners. Avoid disassembling these components.
Further Reading: All About Robot Vacuums with Camera
Step 8: Recalibrate and Test the Vacuum
After cleaning all sensors, return the vacuum to the dock. Open the app (such as the Narwal app) and run a sensor test or start a cleaning cycle. Observe the robot to ensure it now navigates and docks properly.
Recommended Tools to Use
-
Dry microfiber cloth
-
Cotton swabs
-
Soft-bristled brush
-
Compressed air (optional)
-
Flashlight or bright lighting
-
Your robot’s user manual
Extra Tips for Sensor Care
-
Avoid placing the robot in direct sunlight or on reflective surfaces
-
Store the vacuum in a dry, cool location
-
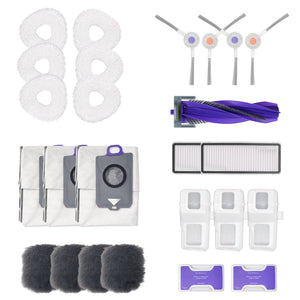
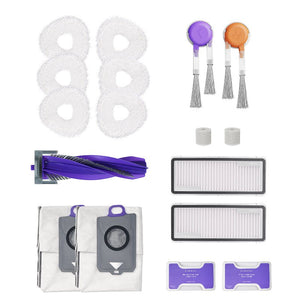
Use original accessories to prevent sensor misalignment or damage
How Often Should You Clean Your Robot Vacuum Sensors?
There’s no single rule for how often you should clean your robot vacuum’s sensors—it all depends on how, where, and how often you use it.
Weekly sensor maintenance is a smart habit if your vacuum runs every day, especially in homes with pets or kids. In high-traffic areas, sensors can quickly accumulate fine dust, hair, and debris, which may disrupt navigation or cause the robot to behave erratically.
For lighter use—say, two to three times per week, a deep sensor clean every two to four weeks is often enough. Smaller homes or cleaner environments may also get by with monthly care.
Still, the best indicator is your robot itself. If it starts missing spots, bumping into furniture more than usual, or showing error alerts, it’s time for a quick check and wipe-down.
Pro Tip:
Keep a simple reminder on your calendar based on your cleaning schedule. A few minutes of upkeep can prevent bigger issues and extend your robot’s lifespan.
What Happens If You Don’t Clean Your Robot Vacuum’s Sensors?
When your robot vacuum starts acting confused—missing dirty spots, getting stuck under chairs, or bumping repeatedly into walls—it’s often not the software or the battery. It’s the sensors.
Sensors are the robot’s “eyes” and “nerves.” They help it avoid cliffs, detect walls and obstacles, follow accurate cleaning paths, and respond to different floor types. But when these sensors are coated in dust, hair, or oily residue, their accuracy drops sharply.
A dirty sensor can cause:
-
Skipped areas during cleaning
-
Repeated collisions with furniture
-
Navigation errors, like spinning in circles or getting stuck
-
Difficulty returning to the dock
-
Increased battery drain due to inefficient movement
And it’s not just about cleaning quality. Letting sensors stay dirty for too long increases internal stress on the robot, especially motors and wheels. This can lead to premature wear or failure of parts that could have lasted much longer.
By taking just a few minutes to wipe and check the sensors regularly, you help your robot maintain its full performance, avoid unnecessary damage, and clean smarter, not harder. It’s a small habit that pays off in cleaner floors and longer product life.

Typical Sensor Issues and Troubleshooting
Robot Vacuum Doesn't Avoid Obstacles
If your robot vacuum bumps into walls or furniture often, the likely cause includes obstructed or malfunctioning bumper sensors.
Solution:
- Clean the bumper sensors with a soft, dry cloth to remove dust and debris.
- Check for physical damage to the sensors. If damaged, contact Narwal customer support for a replacement.
Robot Vacuum Falls from Stairs
This indicates issues with the cliff sensors.
Solution:
- Wipe the cliff sensors located at the bottom of the vacuum with a dry cloth.
- Ensure good lighting conditions, as some sensors may struggle in dim environments.
Robot Vacuum Misses Dirt and Debris
The dirt sensors might be at fault if your vacuum leaves areas uncleaned.
Solution:
- Clean the dirt sensors regularly using a soft brush or cloth.
- Update the robot vacuum's software to ensure the latest cleaning algorithms function well.
Robot Vacuum Doesn't Dock Properly
If your robot vacuum struggles to return to its dock, the infrared docking sensors might be malfunctioning.
Solution:
- Keep the docking area clutter-free to allow clear signals between the vacuum and the dock.
- Clean the docking sensors, both in the vacuum and the docking station.
Robot Vacuum Bumps Multiple Times Before Changing Direction
This problem could result from obstacles obstructing the vacuum's bumper sensors.
Solution:
- Position furniture and objects to create a clear path for the vacuum.
- Regularly inspect and clean the sensors.

Troubleshooting Advanced Issues for Sensors
Unexpected Cleaning Patterns
If your Narwal vacuum exhibits erratic cleaning patterns, recalibration might be necessary.
Steps:
- Reset the cleaning map in the app. This process allows the vacuum to re-map your home, optimizing its cleaning path.
- Ensure the vacuum path is clear of obstacles during the mapping process.
Docking Problems
Problems docking can indicate sensor misalignment or debris blockage.
Solution:
- Clean the docking sensors, both on the vacuum and the charging base.
- Place the Narwal docking station on a flat, stable surface free from obstructions.
- Check for firmware updates in the Narwal app to ensure you use the latest docking algorithms.
Conclusion
Maintaining and troubleshooting your Narwal robot vacuum sensors ensures its best performance. Regular cleaning, using original accessories, and staying updated with software can also keep your robot vacuum running efficiently.
With these tips, you can ensure a spotless home without the hassle. Happy cleaning!
Call to Action
Remember, regular maintenance can go a long way toward keeping your Narwal robot vacuum running like new. Narwal's customer support team is always ready to assist if you face persistent issues. Contact us for further support.
Visit Narwal for more detailed information and to explore our range of products. Also, check out our blog for more insightful articles on robot vacuum maintenance and home cleaning tips.
FAQs
What should I do if my robot vacuum can't detect obstacles?
First, clean the bumper sensors with a soft cloth. If the issue persists, inspect the sensors for physical damage and consult customer support for further assistance.
How can I update my Narwal robot vacuum software?
To update the software, connect your vacuum to the Narwal app. Check the settings for updates and follow the on-screen guidelines to install the latest version.
Why does my robot vacuum keep getting stuck?
Ensure the sensors are clean and no obstructions are in the vacuum's path. If necessary, rearrange furniture to create a more straightforward navigation path.


