


Teaching your robot vacuum to avoid obstacles starts with a few simple adjustments: clear the clutter, create a smooth path, and let the vacuum map your home properly. From there, you can enhance its navigation by setting virtual boundaries, maintaining its sensors, and updating its software regularly. For homes with tricky layouts or raised thresholds, choosing a model with smart obstacle recognition and strong climbing ability makes all the difference.
This guide covers everything you need — from setting up your cleaning space and fine-tuning obstacle detection, to handling threshold transitions and selecting the best robot vacuums for advanced navigation. You'll also find tips for fixing common issues like poor master location and preventing your robot from getting stuck under furniture.
Understanding How Robot Vacuums Avoid Obstacles
Before you can teach your vacuum how to avoid obstacles, it’s important to understand how it detects them in the first place.
Sensor Technologies in Robot Vacuums
Robot vacuums rely on different types of sensors to navigate and avoid obstacles. Here’s how they work:
-
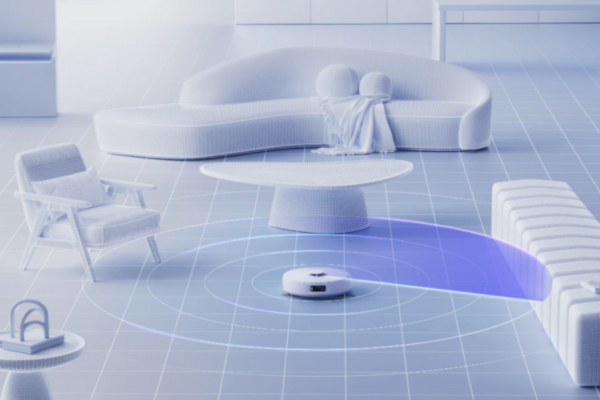
LIDAR Sensors: These laser-based sensors scan the environment and map the room in 360 degrees. They can detect obstacles up to 10 meters away, helping the robot create a virtual map of your home.
-
Infrared Sensors: These sensors work by sending out infrared light and measuring how it bounces back. They are useful for detecting nearby obstacles like walls or furniture.
-
Ultrasonic Sensors: Like infrared sensors, these sensors send out sound waves and calculate the time it takes for them to bounce back. They are especially good for detecting smaller, softer obstacles like curtains or cables.
Understanding these sensors will help you better set up your space to enhance your robot’s ability to navigate.
Step 1: Set Up the Cleaning Space
The first step to improving obstacle avoidance is to make your space as robot-friendly as possible. This goes beyond just clearing the floor—small adjustments can make a big difference.
Clear the Floor Before the First Clean
Start by removing small items like toys, cords, pet bowls, or shoes. These can confuse your robot or get it stuck. A quick tidy-up before each run ensures smoother navigation.
Use Physical Barriers to Block Off Areas
Not all robot vacuums support virtual boundaries. In these cases, simple physical solutions can be just as effective. Use furniture placement, books, or even baby gates to block areas you don’t want cleaned. These work especially well for basic models without app control or smart mapping.
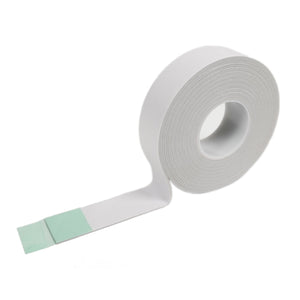
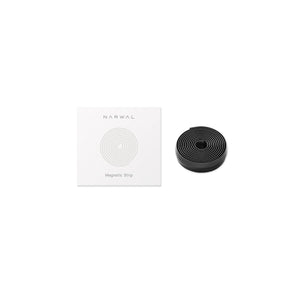
Try Magnetic Strips or Boundary Tape
For robots that detect magnetic fields, boundary strips can create invisible “walls.” Place them across doorways or around delicate spaces to prevent your vacuum from entering.
Create an Open Path
If your robot frequently bumps into furniture, consider adjusting the layout. Moving chairs or small tables slightly can help your vacuum move freely.
Tip: If you notice the robot repeatedly struggling with a specific area, try combining physical and digital tools to guide it more effectively.
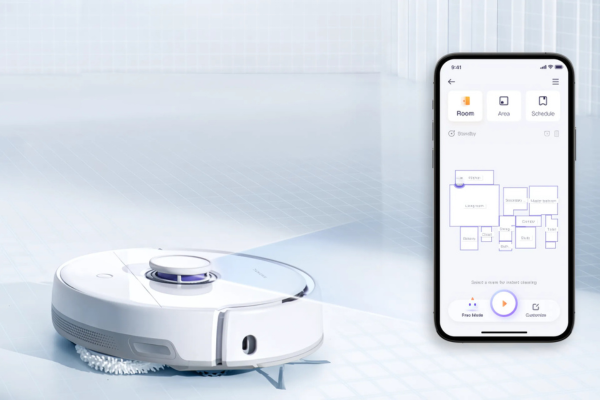
Step 2: Teach Your Robot by Using Initial Mapping
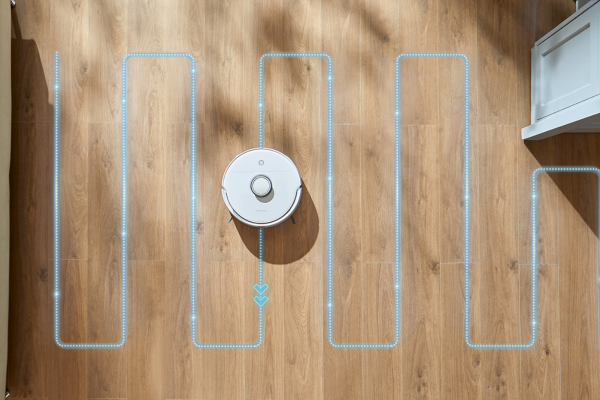
Most modern robot vacuums create a map of your home after their first cleaning session. This map helps the robot plan its routes and avoid obstacles in the future.
Run the Vacuum in Map Mode
-
Start with a Clean Room: Make sure the room is as clear as possible of obstacles and clutter.
-
Activate Mapping Mode: Many robot vacuums, like those with LIDAR technology, will enter mapping mode during the first cleaning cycle. Let the robot run through the entire space so it can build a digital map of the room.
-
What the Robot Will Do: During this initial run, the vacuum will navigate your home slowly, scanning and mapping every room. It may bump into furniture or walls, but this helps it learn the layout.
Check the Map After the First Clean
Once the robot finishes, check the map it’s created. If there are areas where the vacuum frequently gets stuck, it’s worth adjusting the layout or using virtual barriers (explained below).
Troubleshooting Mapping Issues
If your robot frequently gets lost, rebuilds its map, or struggles to return to the base, it might be having trouble with the master location—the internal reference it uses to navigate. This often happens when the LIDAR sensor is dirty, the docking station is moved, or the robot is exposed to reflective surfaces like mirrors or strong sunlight. To prevent this, keep sensors clean and avoid moving the base. Once the reference point remains stable, your robot will map more accurately and clean with far fewer interruptions.
Step 3: Fine-Tune the Settings for Better Obstacle Avoidance
Now that your robot has a map of your home, you can further enhance its ability to avoid obstacles through these tips:
Keep Sensors Clean
The sensors on your robot are crucial for obstacle detection. As time passes, dust and dirt accumulate on them, which can reduce their effectiveness.
-
Cleaning the Sensors: Gently wipe the sensors with a dry, soft cloth. Focus on the LIDAR and infrared sensors, as these are the primary ones used for navigation.
-
Frequency: Clean the sensors every 1-2 weeks to keep them functioning optimally.
Use Software Updates
Manufacturers frequently release software updates to improve performance, including obstacle detection.
-
How to Update: Check your robot’s app for firmware updates. These can include improvements to the navigation system, helping your vacuum avoid obstacles more efficiently.
-
Tip: Make sure to update your robot vacuum’s app regularly to access the newest navigation improvements.
Step 4: Set Virtual Boundaries to Guide Your Robot
Virtual boundaries are a powerful way to guide your robot vacuum and prevent it from entering sensitive areas of your home. Depending on your model, these boundaries can be set in a few different ways.
Create Virtual Walls
Virtual walls act as invisible lines the robot won’t cross. There are different ways to implement them:
-
Infrared Signal Emitters: Some robots support small standalone devices that emit an invisible infrared barrier. These can be placed near pet feeding areas, stairs, or fragile decor to keep the robot out.
-
App-Based Virtual Walls: Models like Narwal support virtual wall features directly in the app. You can draw precise boundaries on your home’s map to prevent the robot from entering specific zones, perfect for areas with cables, pet toys, or clutter.
-
Magnetic Strips: For basic models that don’t support app controls, magnetic tape can serve as a physical virtual wall. The robot senses the strip and automatically avoids crossing it.
Set No-Go Zones
Within the Narwal app, you can also define no-go zones, specific areas where the robot should never enter, regardless of the cleaning cycle. This adds another layer of control for more complex room layouts.
Tip: If you’re unsure which virtual boundary method your robot supports, check the app or manual. Narwal models offer a clean, flexible app experience that makes setting up virtual limits fast and intuitive.
By using the right type of virtual boundary, whether digital or physical, you can help your robot clean more efficiently while avoiding the areas you want to keep off-limits.
Step 5: Train Your Robot by Repeating the Process
Once your robot has created a map and is using virtual boundaries, it’s time to train it to avoid obstacles better.
Allow the Robot to Clean Frequently
The more the robot cleans, the better it gets at avoiding obstacles. Try to run the robot regularly, especially in areas where it tends to get stuck.
-
Tip: Let your robot clean different rooms and spaces to help it adapt to various environments and obstacles.
Observe and Adjust
While the robot is cleaning, observe how it behaves around obstacles. If it’s still getting stuck, adjust the layout, move obstacles, or update the map in the app.
-
Identify problem spots: Focus on places where the robot frequently becomes trapped. Is it because of cables, furniture, or other barriers? Try adjusting the virtual boundaries to prevent this.
Step 6: Choose the Best Robot Vacuum for Obstacle Avoidance
Not all robot vacuums are built the same, especially when it comes to navigating cluttered spaces or avoiding everyday obstacles. If you’re looking for the best performance in obstacle avoidance, two Narwal models stand out for their intelligence, precision, and adaptability.
Narwal Freo Z Ultra – Best for Smart Obstacle Recognition
The Freo Z Ultra is ideal for users who want a vacuum that doesn’t just navigate—but thinks. With dual 136° RGB cameras and AI DirtSense™ technology, it recognizes over 120 types of obstacles and adjusts its path in real time. Whether it’s tangled cords, shoes, or pet toys, this model sees it and swerves.
Key highlights:
-
AI-powered visual navigation that adapts over time
-
High obstacle recognition accuracy for fewer bumps and detours
-
Seamless cleaning experience even in busy households
[cta:narwal-freo-z-ultra-robot-vacuum-mop]
Narwal Freo Z10 – Best for Homes with Thresholds and Corners
The Freo Z10 is designed for spaces with physical challenges—like high door thresholds or tight edges. With a powerful climbing ability over 20mm and a bionic triangular mop that reaches deep into corners, it ensures every inch of your floor is cleaned thoroughly.
Why it excels:
-
Easily crosses raised floor transitions
-
Dynamic pressure mopping system for edge-to-edge coverage
-
Ideal for complex room layouts with mixed flooring
[cta:narwal-freo-z10-robot-vacuum-mop]
Whether you need advanced AI recognition or superior physical maneuverability, choosing the right Narwal vacuum gives you smarter, smoother, and more hands-free cleaning from day one.
Step 7: Helping Your Robot Over Thresholds
If your home has raised thresholds or transition strips between rooms, your robot vacuum might struggle to move across them smoothly. Here are a few practical ways to improve pass-through performance:
Use Ramps or Mats
Place a rubber ramp or a flat wooden mat on either side of the threshold. This softens the height change and gives the robot a smoother surface to climb over, reducing the chance of getting stuck.
Change the Approach Angle
Instead of letting the robot hit the threshold head-on, try repositioning furniture or start points so the robot approaches it diagonally. A more gradual approach can help the wheels grip better and make it easier to pass.
Does the size of my home affect how I teach my robot vacuum to avoid obstacles?
Yes, smaller spaces may require more fine-tuning of the virtual barriers, while larger homes might benefit from setting zones for more effective cleaning.
How can I stop my robot vacuum from getting caught on rugs or carpets?
To prevent your robot vacuum from getting caught on rugs or carpets, consider using virtual barriers to block off these areas or invest in a model with higher ground clearance.
Can I use my robot vacuum in a home with pets?
Absolutely, several robot vacuums are built to tackle pet hair. Look for a vacuum equipped with advanced brushes or strong suction to efficiently remove both hair and dirt.
How do I keep my robot vacuum from going under my couch?
Use magnetic strips or app-based no-go zones to block low-clearance areas. Some Narwal models auto-detect tight spaces and avoid them.
What can I use to block a robot vacuum?
Try foam strips, rubber stoppers, or baby gates—simple tools work well for models without virtual barriers.
Conclusion
Teaching your robot vacuum to avoid obstacles isn’t complicated, but it makes a big difference. With smart setup, mapping, and the right tools, you’ll spend less time rescuing your robot and more time enjoying a cleaner home.
Paired with advanced models like the Narwal Freo Z Ultra and Freo Z10, obstacle avoidance becomes seamless. These robots recognize, adapt, and clean with precision, so you don’t have to micromanage.
Ready for stress-free cleaning? Choose a Narwal model that works smarter for your space.


